
Learn How to Make Nigiri Sushi at home with this beginner-friendly recipe, with all the information you need to master the craft on your first try from cutting delicate slices of fish to molding rice.
Packed with tips and troubleshooting advice to ensure you master nigiri on your first attempt, you're sure to learn all the skills you need to prepare a variety of restaurant-quality nigiri at home, including favorites like salmon nigiri, tuna, and shrimp.
Jump to:
Why you'll love this recipe
- A comprehensive beginner-friendly guide that's packed with all the information you need to master nigiri on your first attempt.
- With extra tips and troubleshooting advice to help you avoid common pitfalls and perfect your technique.
- Use everyday tools and equipment you already have in your kitchen.
Ingredients
Ingredient Notes
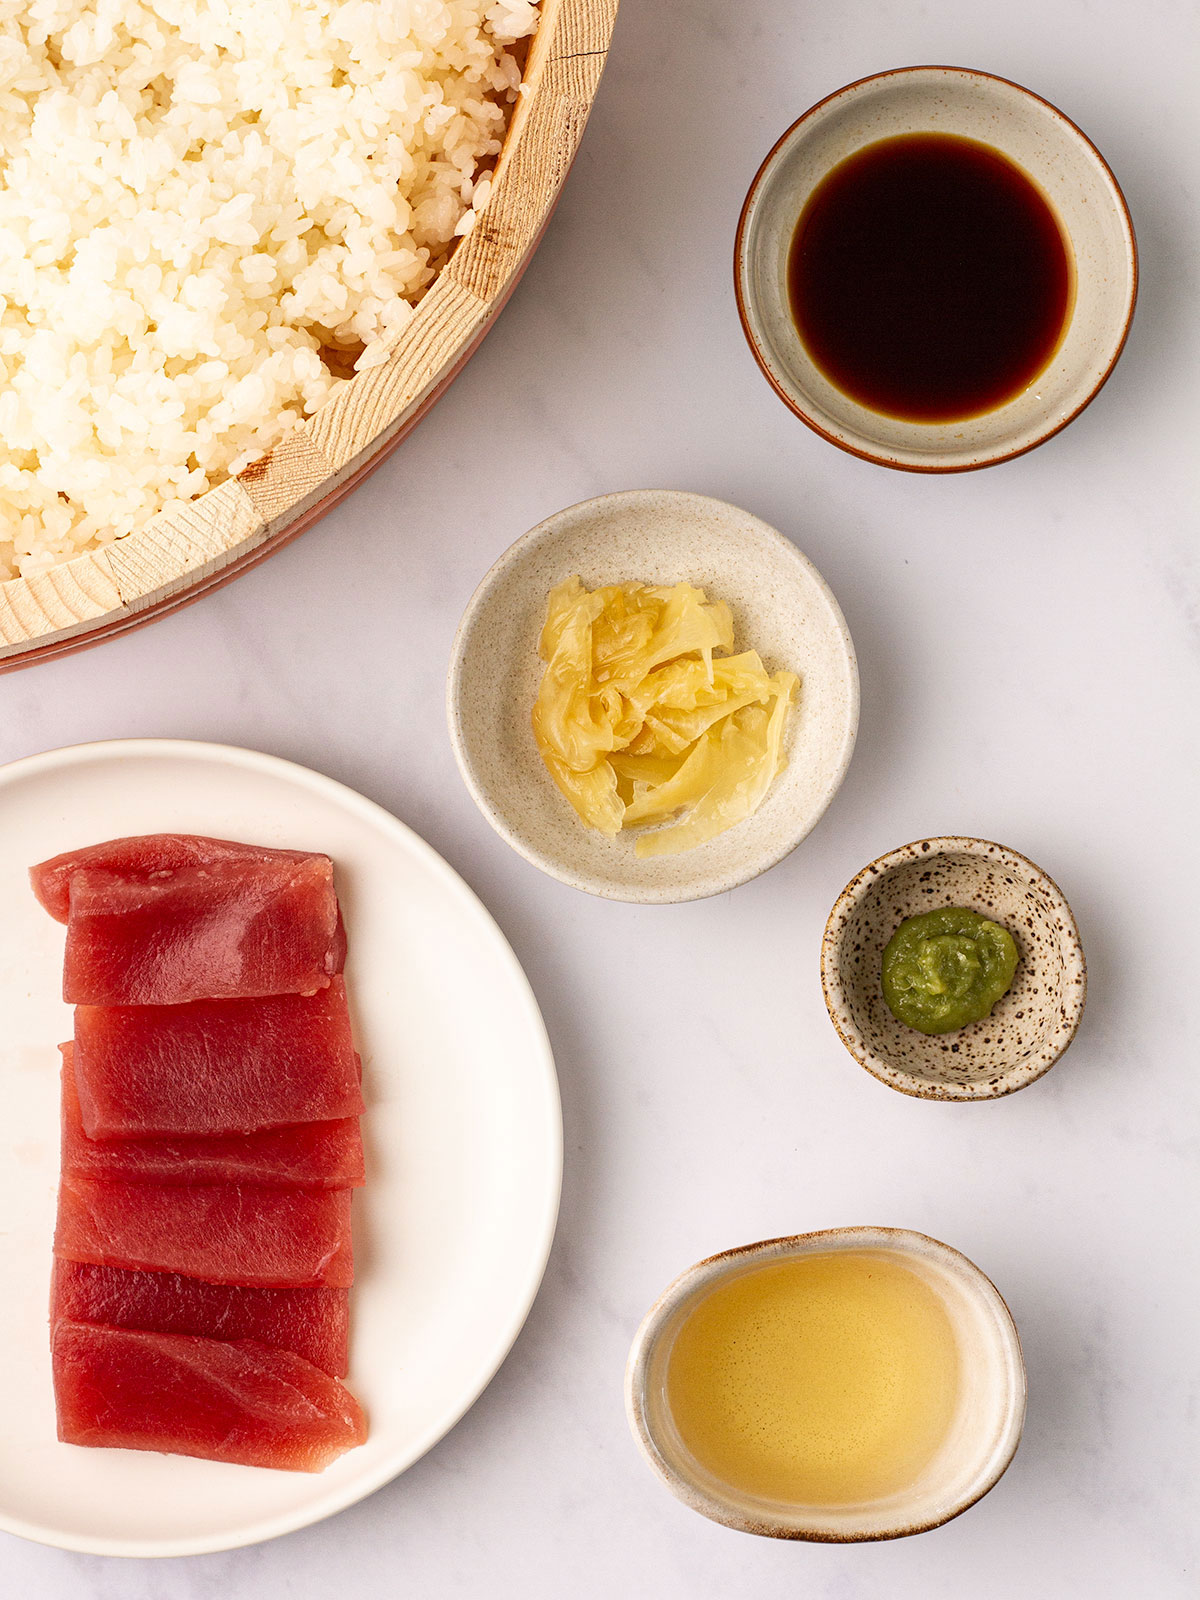
- Sushi rice: You need a batch of cooked sushi rice, seasoned with sushi vinegar (or Sushizu). It's simple to prepare using your stove, rice cooker, or Instant Pot using my easy-to-follow sushi rice recipes.
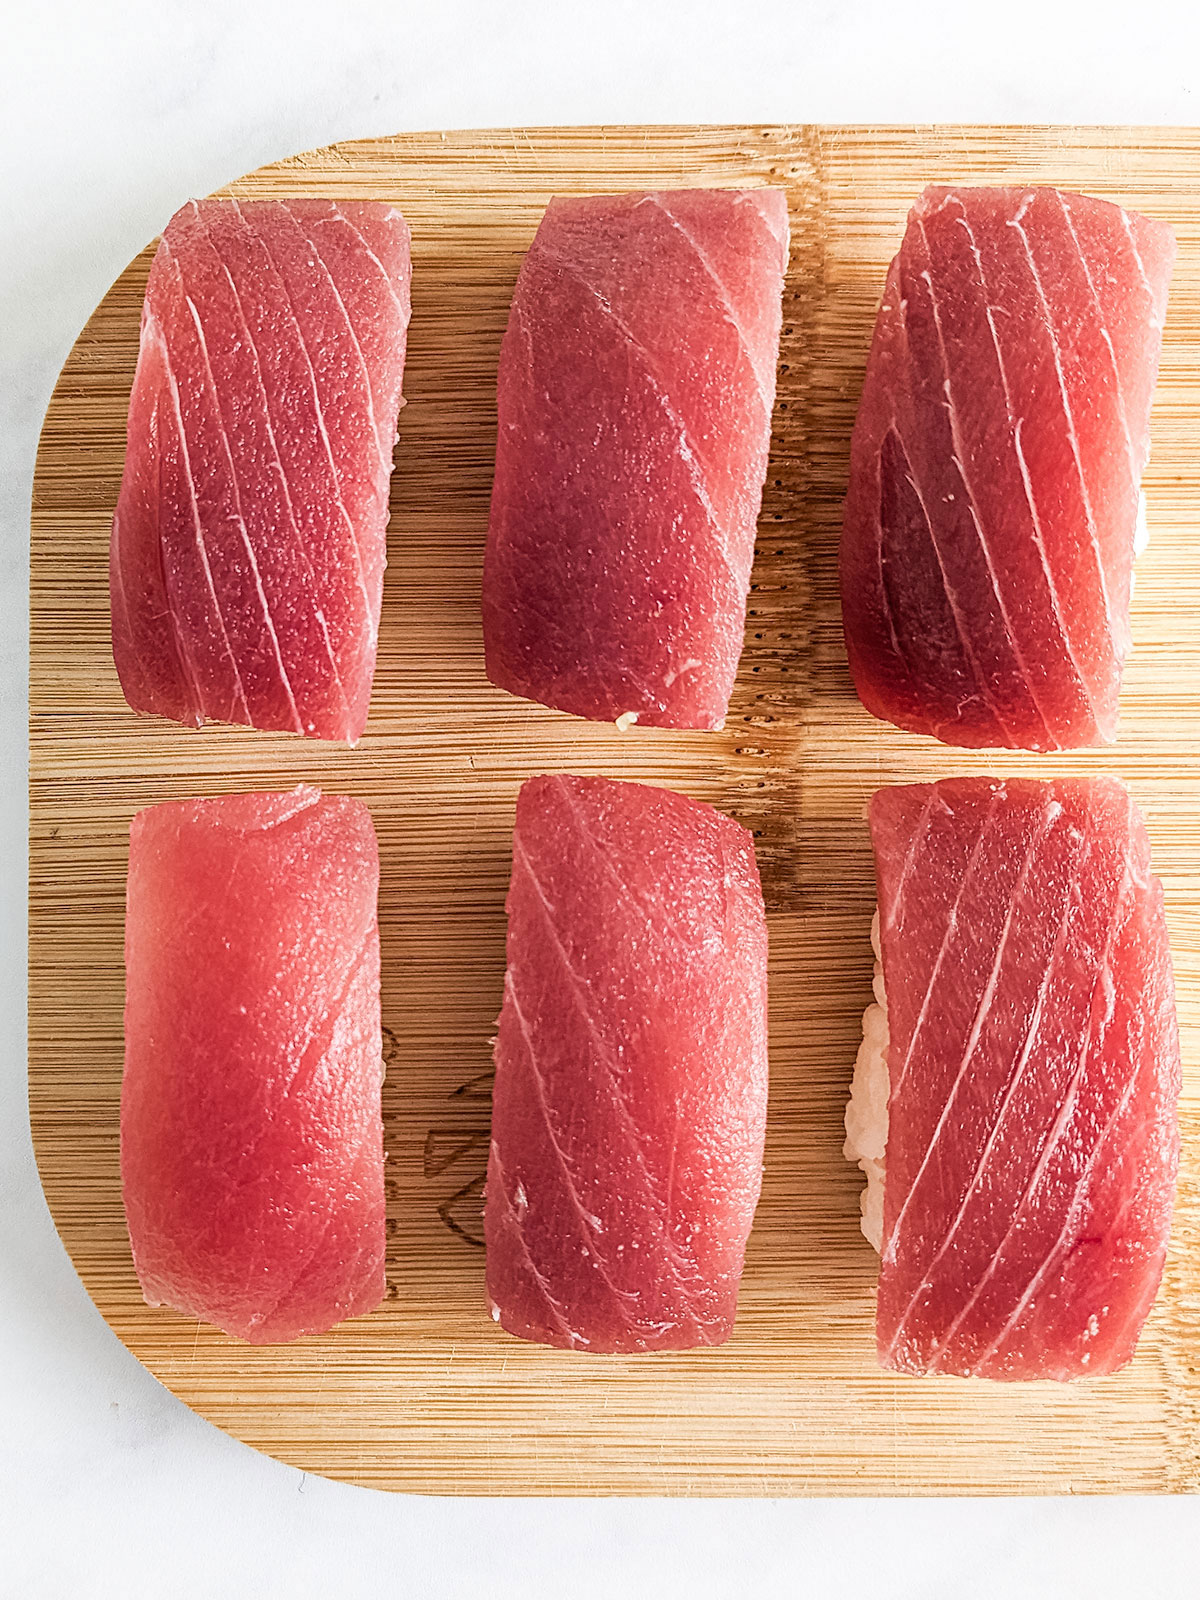
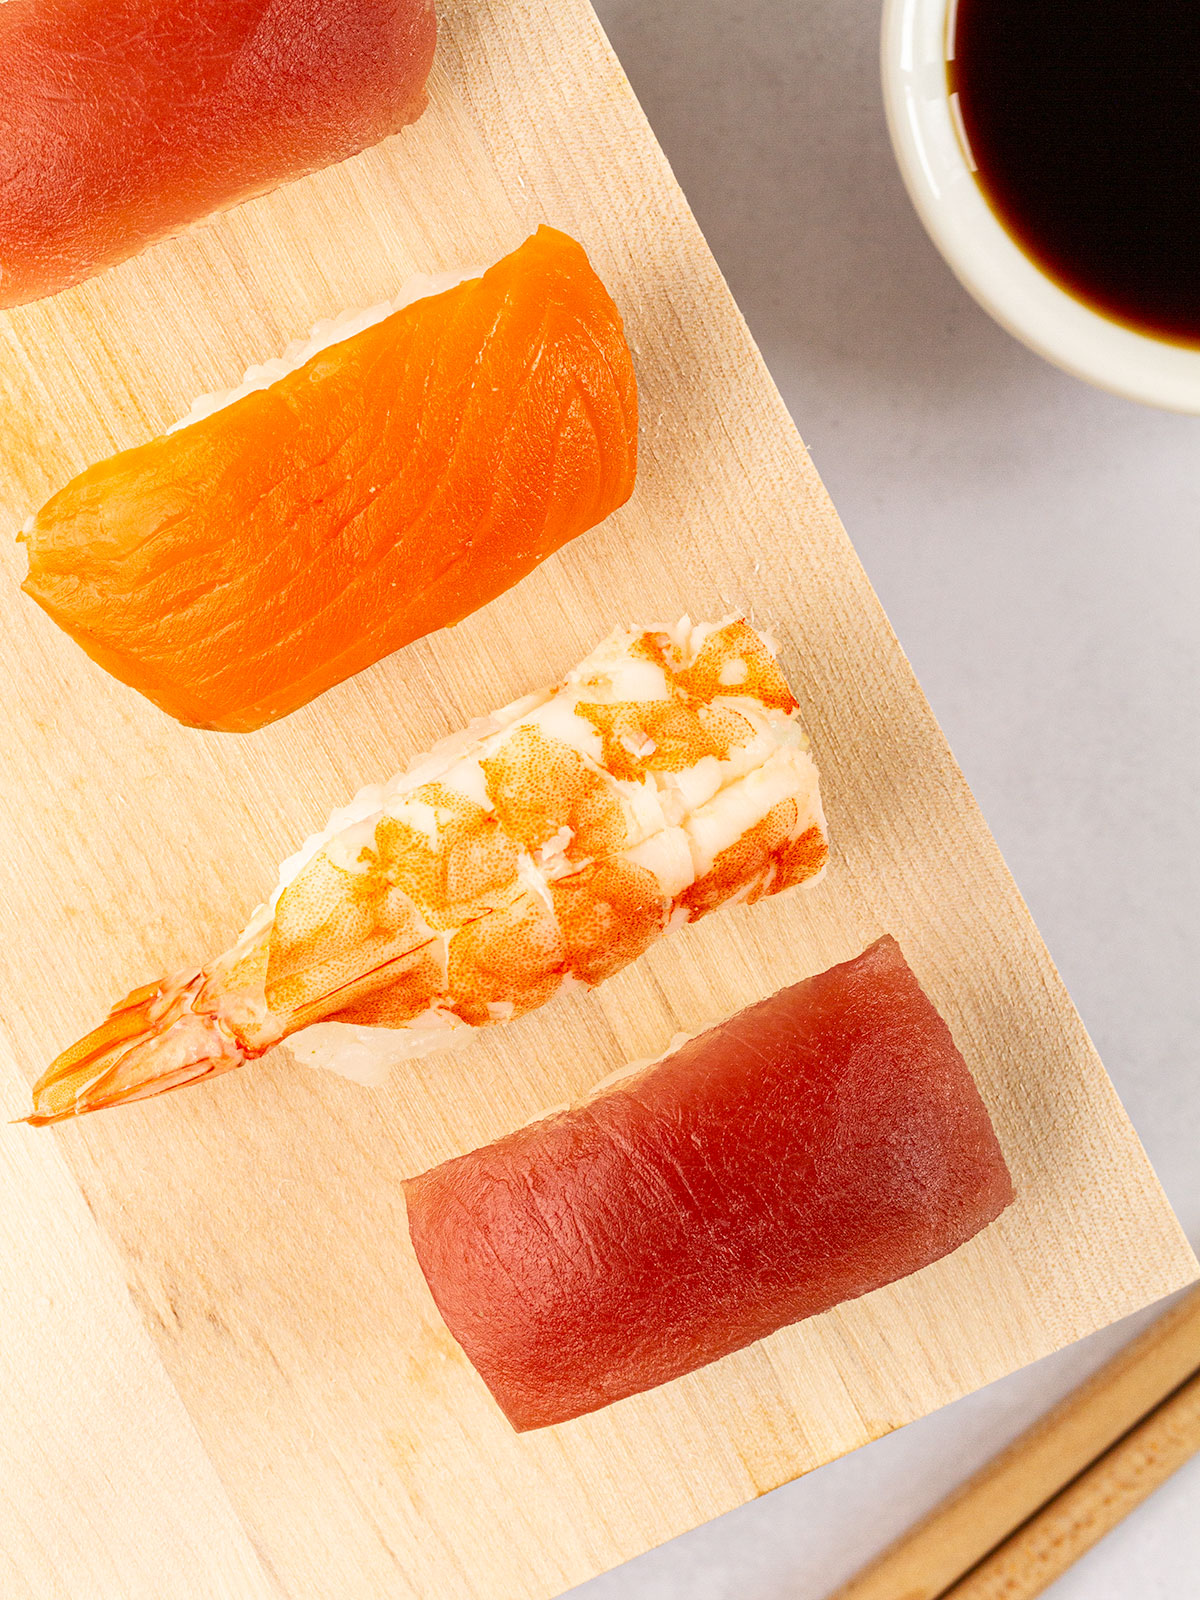
- Sashimi-Grade Fish: Allocate around 0.5oz (15g) per nigiri sliced to 3 inches long, 1 inch wide, and ¼ inch thick.
- Wasabi: (optional) Available in powder or paste form, it adds a unique kick to each bite.
- Rice Vinegar: Mixed with cold water to make 'hand water,' to prevent rice from sticking to your hands as you form the nigiri. You can substitute it with apple cider vinegar.
How to slice fish for nigiri
Mastering fish slicing is essential for making perfect nigiri. When it comes to size aim for 3-inch long, 1-inch wide, and ⅛-inch thick. You can slice the fish yourself or ask the fishmonger to slice the sashimi for nigiri.
Having the fishmonger cut the fish is the most convenient option if they are experienced in cutting fish for sushi. In my experience, they don't always hit the mark and I've found that taking matters into my own hands gives me the best results. Plus, there's something satisfying about mastering the cutting technique at home, ensuring each piece of fish is perfect for your nigiri.
Use a very sharp knife to cut against the fish's muscle fibers in one smooth motion using the full length of the blade. A sushi knife is a great investment if you make sushi at home often, but it isn't necessary. The key is using a sharp knife. A regular knife that's recently been sharpened is much better than a blunt sushi knife.
Tip: Fill a small bowl or small baking dish with ice cubes and cover with cling film. Place the sliced fish on top to keep it fresh and cool.
Hand water
Hand water (Tezu) is a simple mix of 1 cup of water with 2 tablespoons of rice vinegar that is used to stop the sticky sushi rice from sticking to your hands. By creating a non-stick barrier, Tezu ensures the sushi rice slides off smoothly, allowing for cleaner and more precise shapes.
Before you handle the rice lightly moisten the palm of one hand with the hand water, then briskly rub both hands together. Moderation is key. Try to use just enough Tezu to ward off stickiness but avoid using too much. You don't want the rice to fall apart. As you form your nigiri, keep Tezu close by, refreshing your hands regularly to maintain that perfect, non-stick touch.
What size should the nigiri be?
The amount of rice you'll need for each nigiri will vary depending on the size of your fish slices.
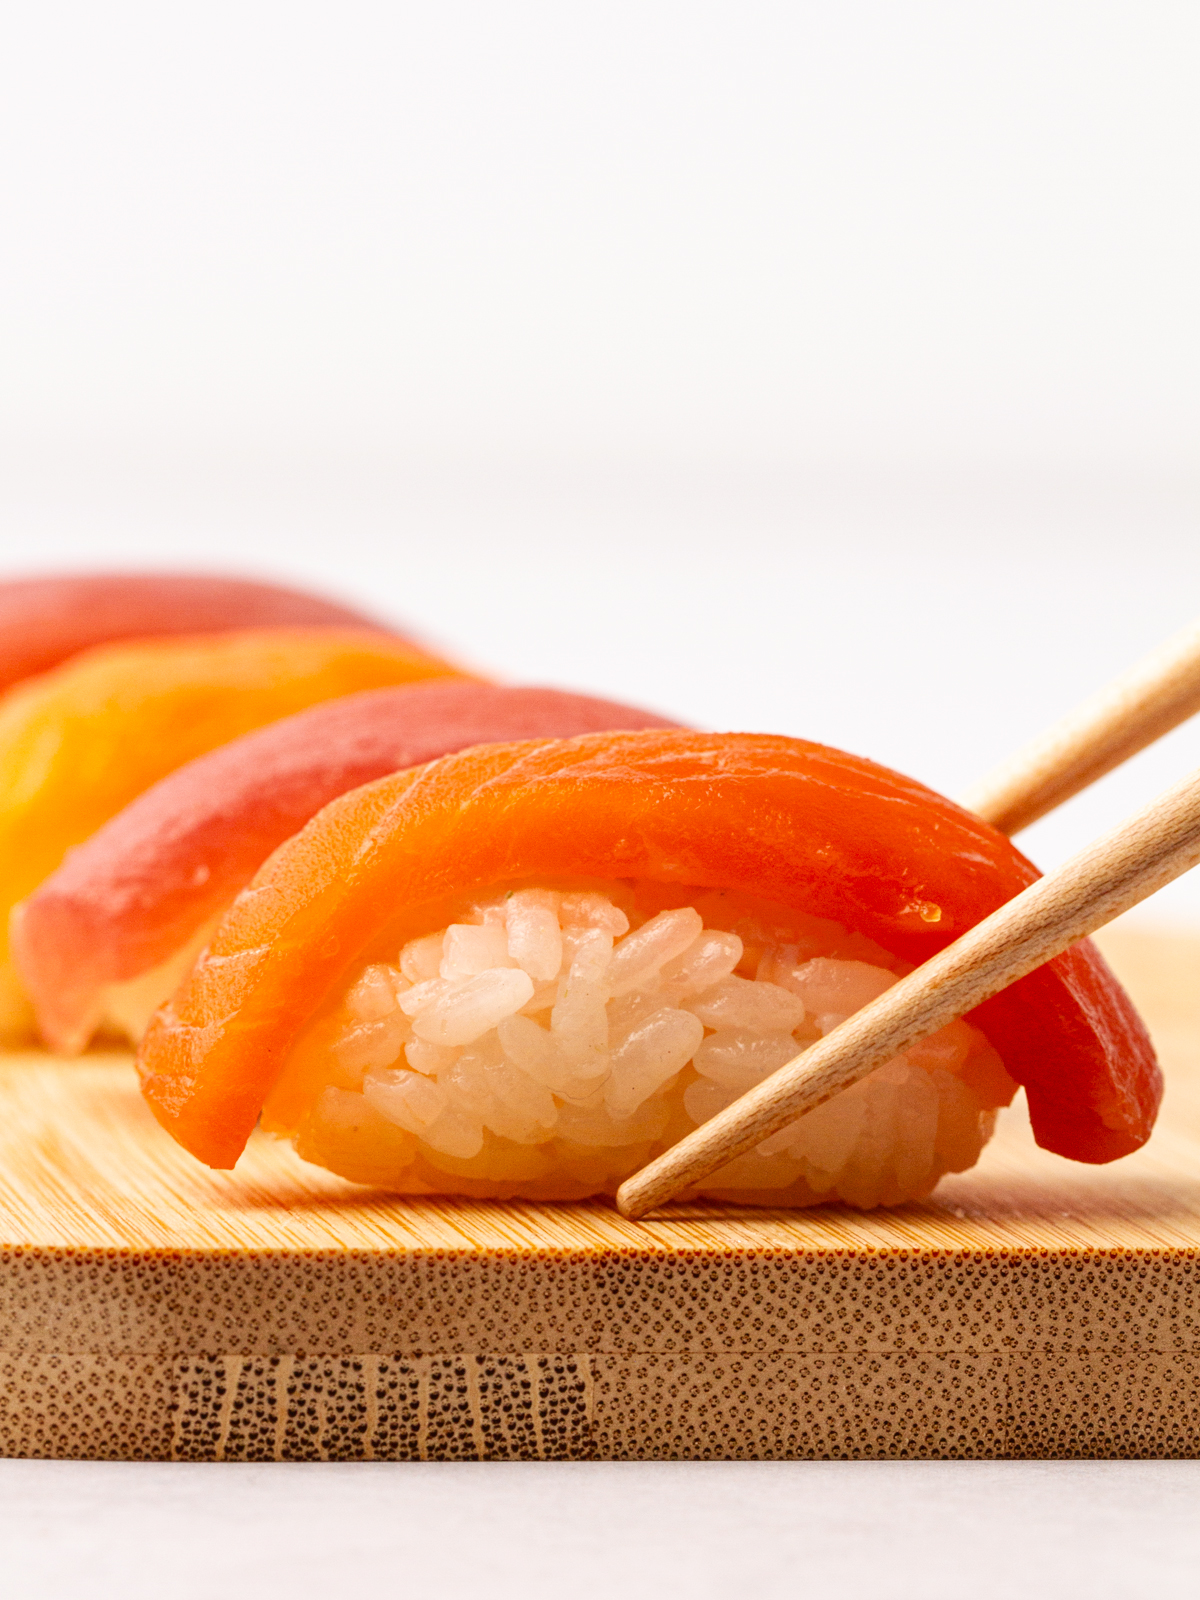
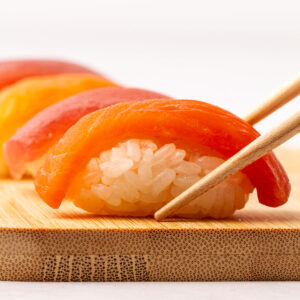
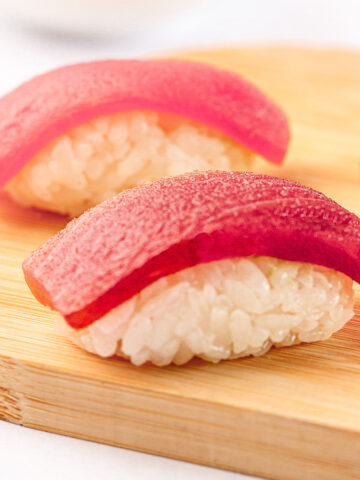
In authentic nigiri, the fish is carefully draped over, like a cozy blanket covering a bed. You might have seen nigiri with the fish on top. This is common in Western sushi restaurants, but you'd never see it done this way in Japan.
Quick Recipe Video
Step-by-Step Instructions
Step 1: Moisten your palm with hand water and rub your hands together.
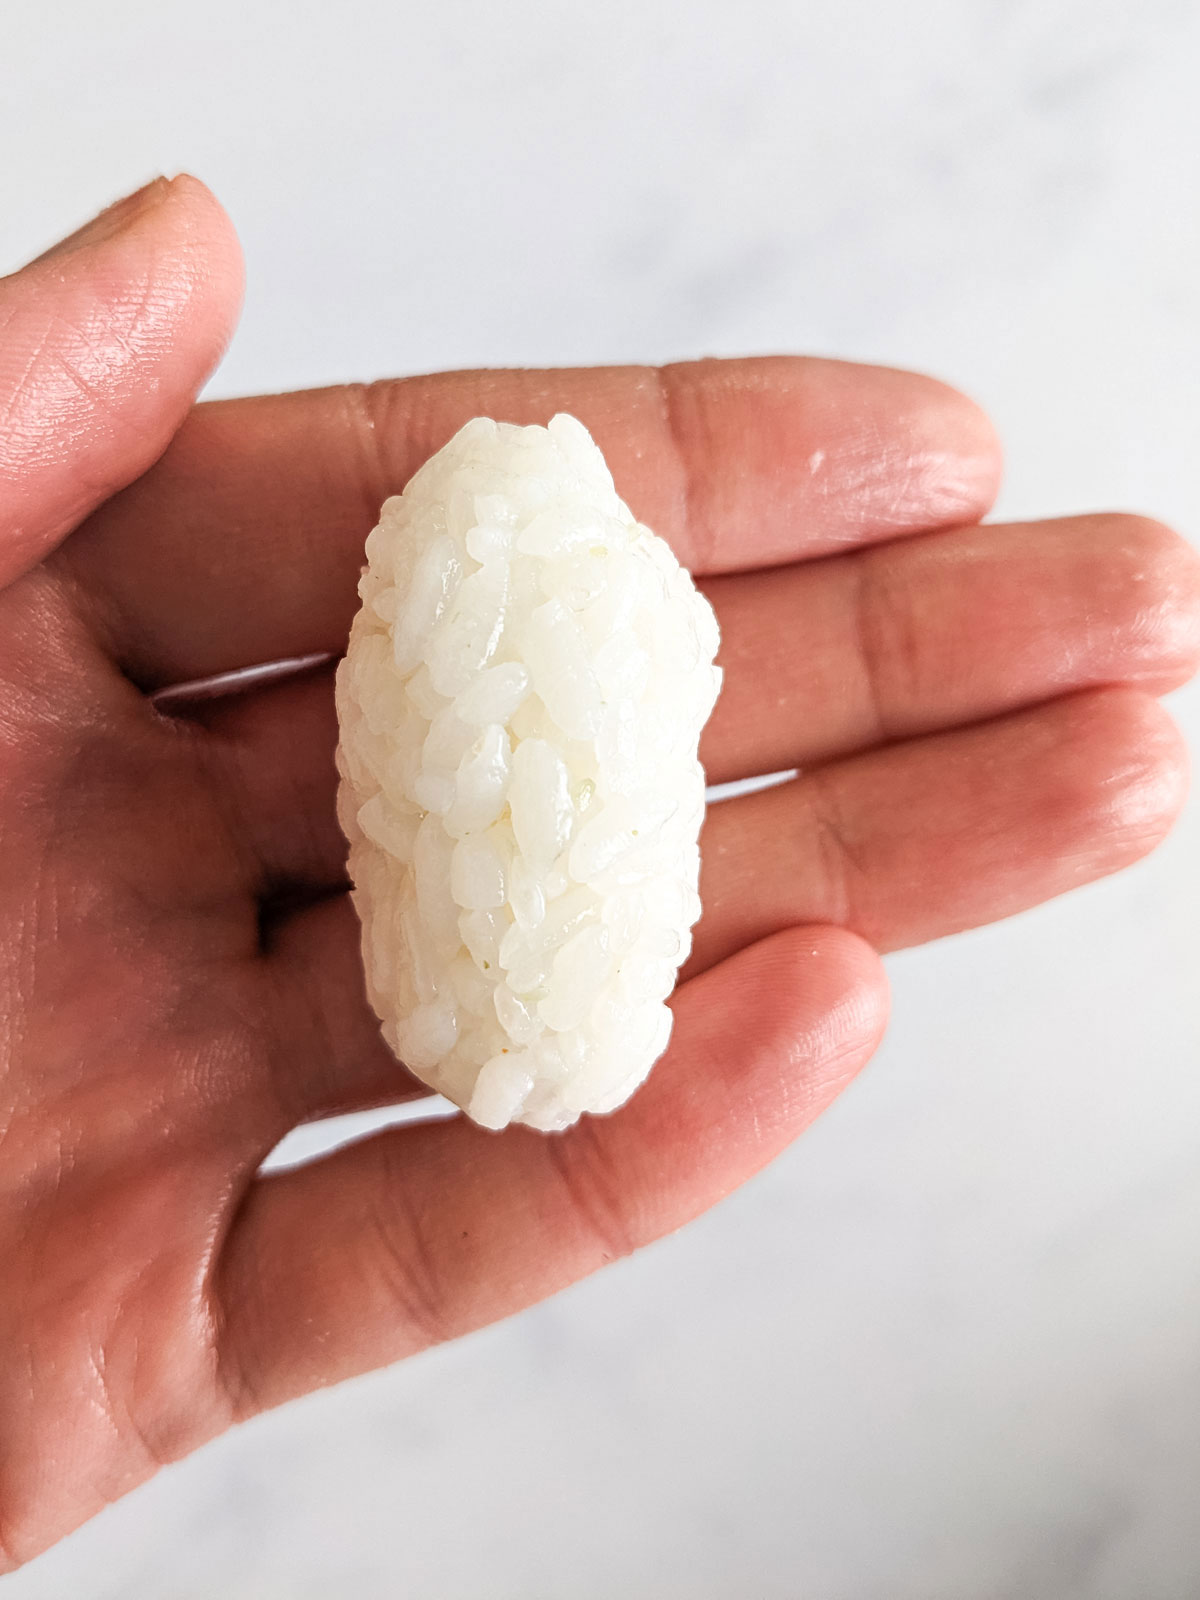
Step 2: Pick up an egg-shaped ball of rice with your dominant hand, and compress it gently without crushing it into a rounded rectangular cylinder. Turn the rice in your palm a couple of times.

Step 3: Pick up a piece of fish with your other hand and let it rest on your fingers.
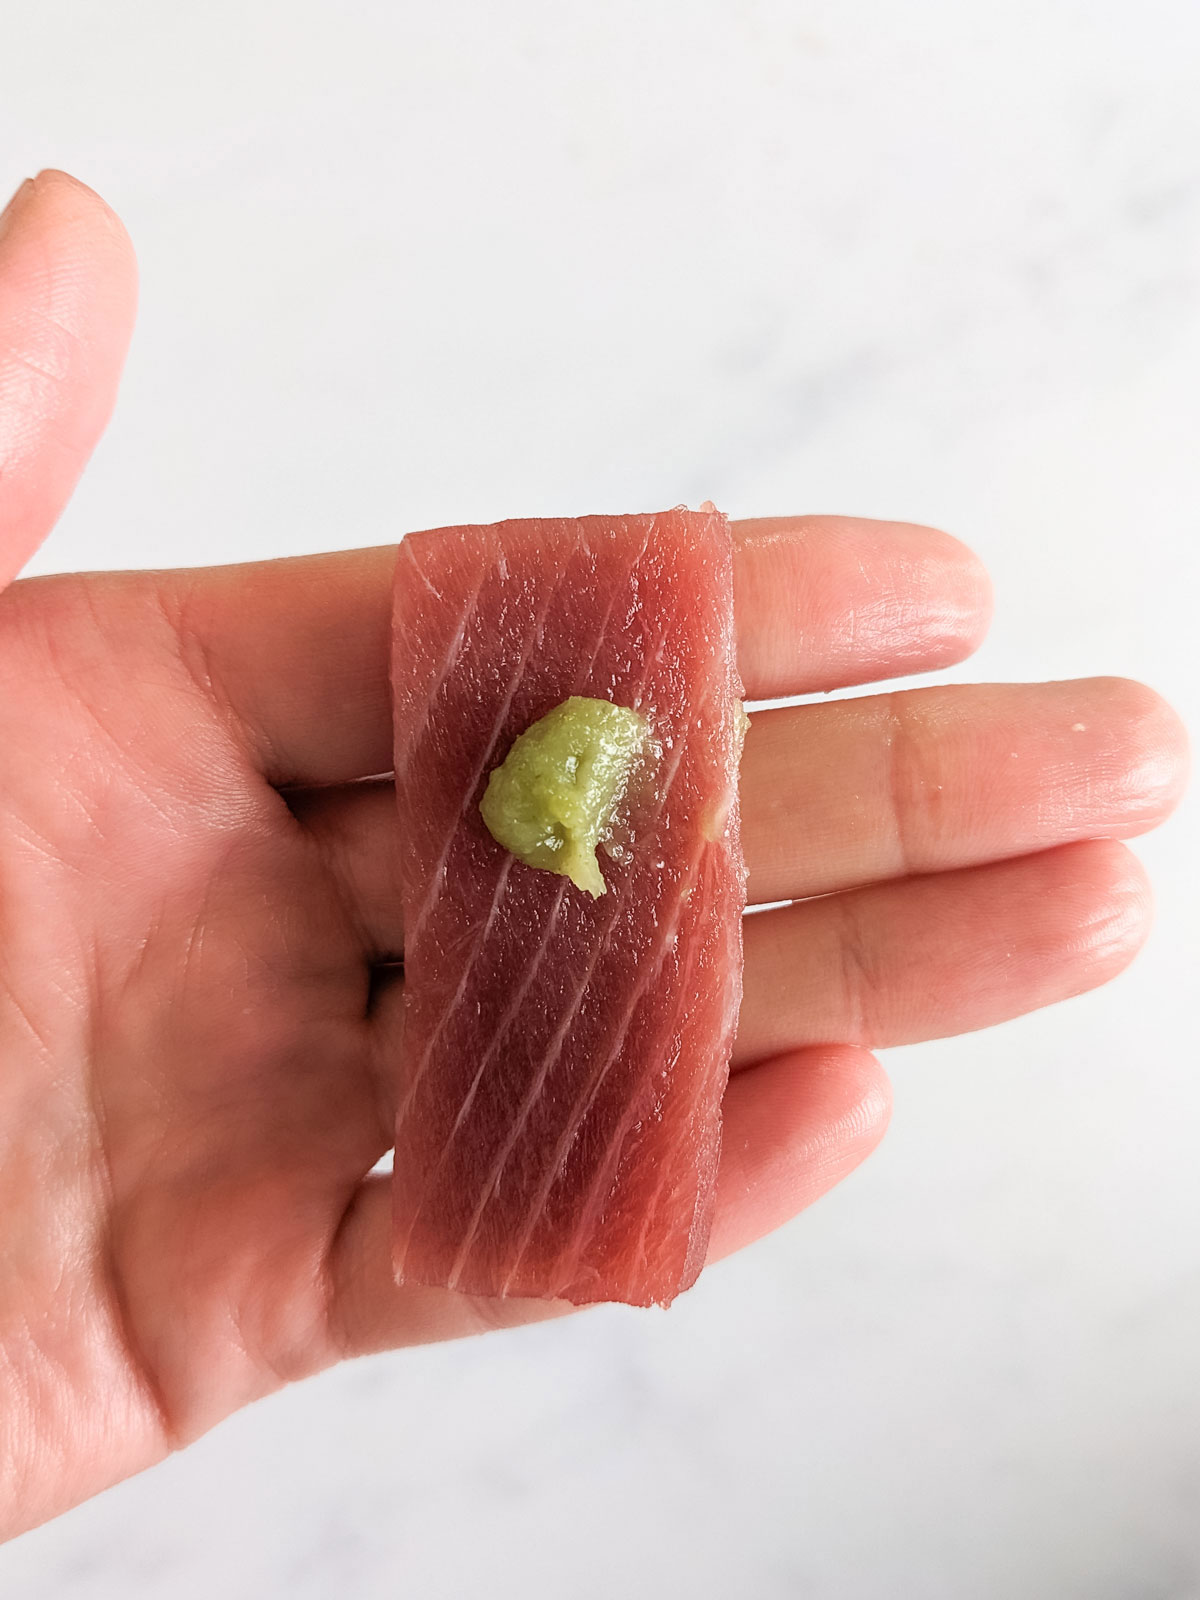
Step 4: Optional: If you are using wasabi, smear a little on the index finger of your right hand and gently run it along the fish.
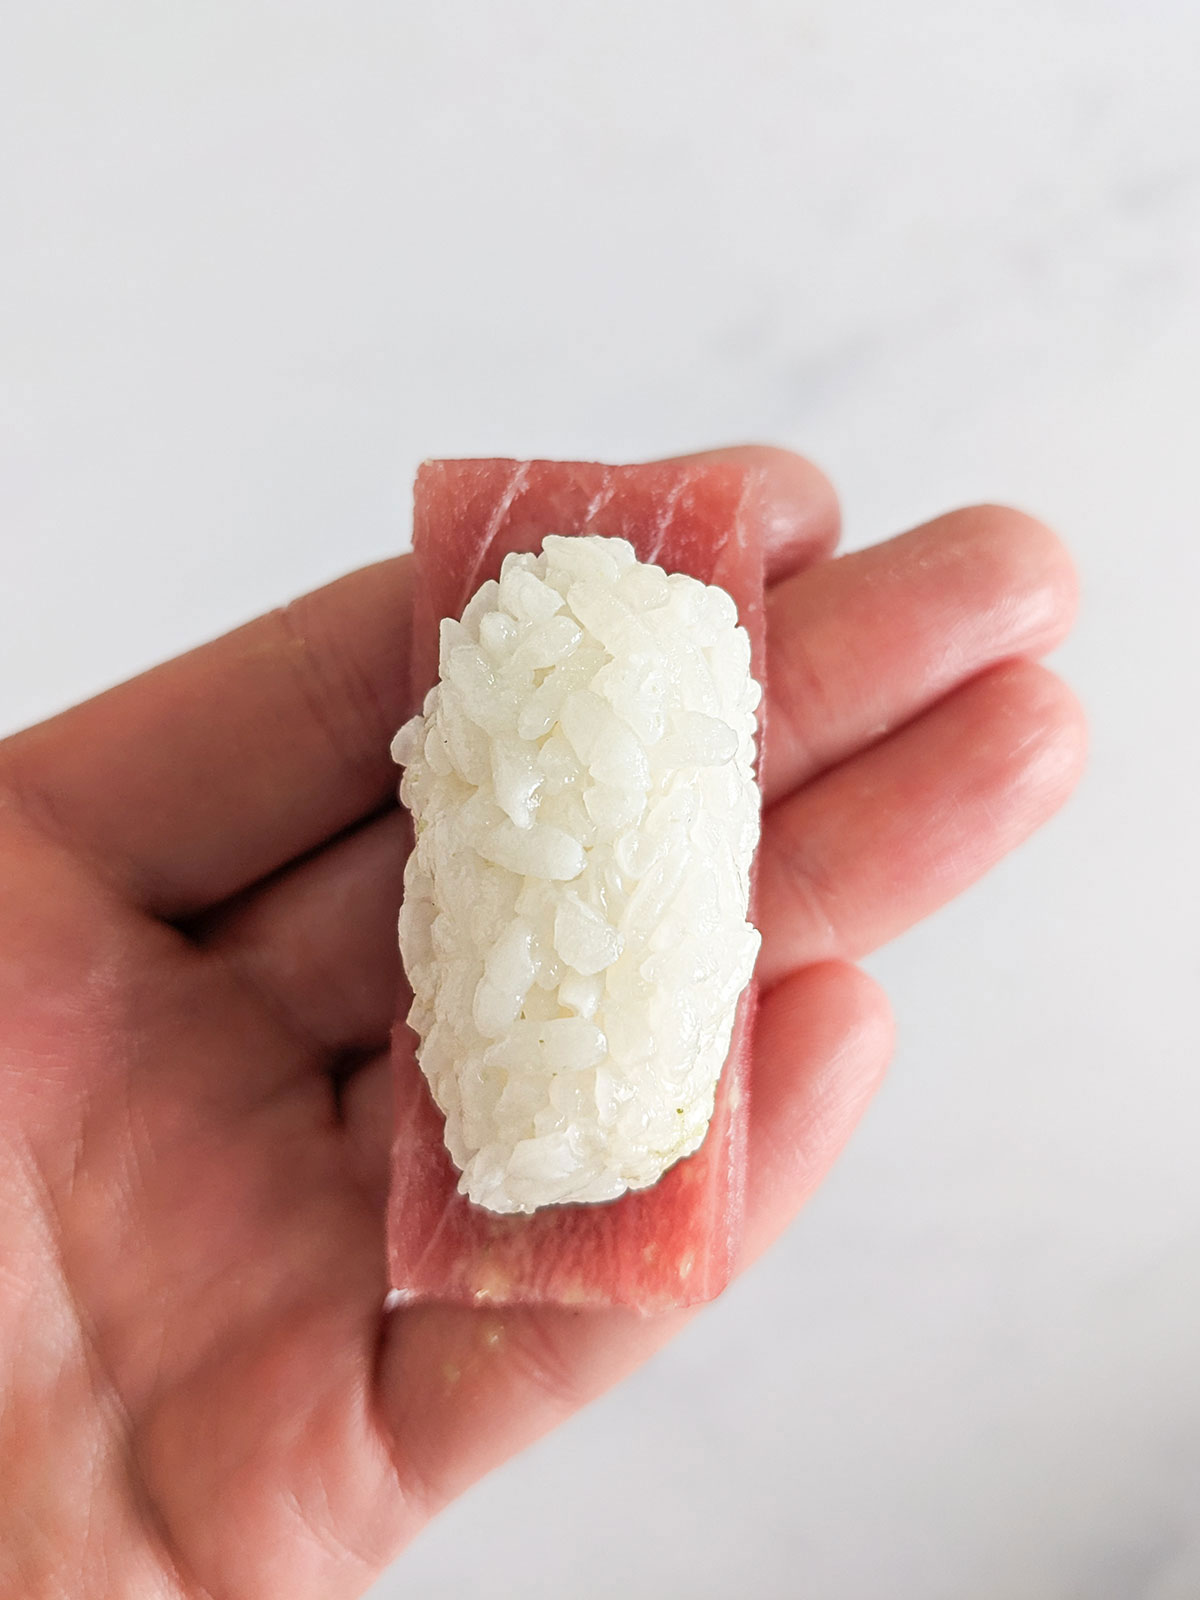
Step 5: Place the rice ball onto the fish and gently press down.
Step 6: Turn the upside-down nigiri the correct way up and press your index and middle fingers onto the fish to hold it in place.Place the finished nigiri onto a wooden board and repeat the process with the remaining rice and fish.
Expert Tips
- Slice the fish against the muscle fibers, aiming for pieces 3 inches long, 1 inch wide, and about ⅛ inch thick. A skilled fishmonger can do this for you if they're experienced with cutting fish for sushi.
- Get the right rice-to-fish ratio; the fish should gently drape over the rice like a blanket, not sit on top.
- Keep your sliced fish cool and fresh by placing it on a bowl of ice covered with cling film.
- Use hand water (Tezu) to keep your fingers from sticking to the rice. Be careful not to use so much that the rice falls apart.
- Press the rice gently but firmly when forming the nigiri. You want it to hold together without squishing the grains.
Types of nigiri
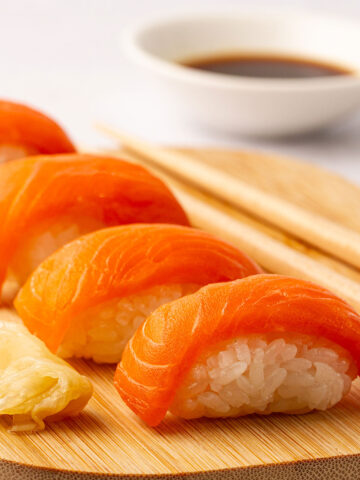
Once you've got the hang of nigiri making, there are so many types you can try. Start with salmon and tuna if you're a beginner — they're the easiest to buy and simple to work with. Master these, and then you're ready to explore more nigiri sushi like:
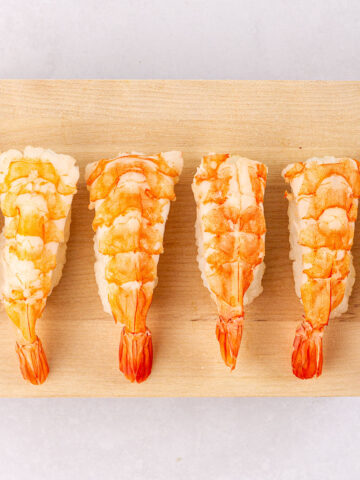
- Shrimp (Ebi)
- Scallops
- Mackerel
- Egg (Tamago)
- Squid
- Octopus
How to eat nigiri
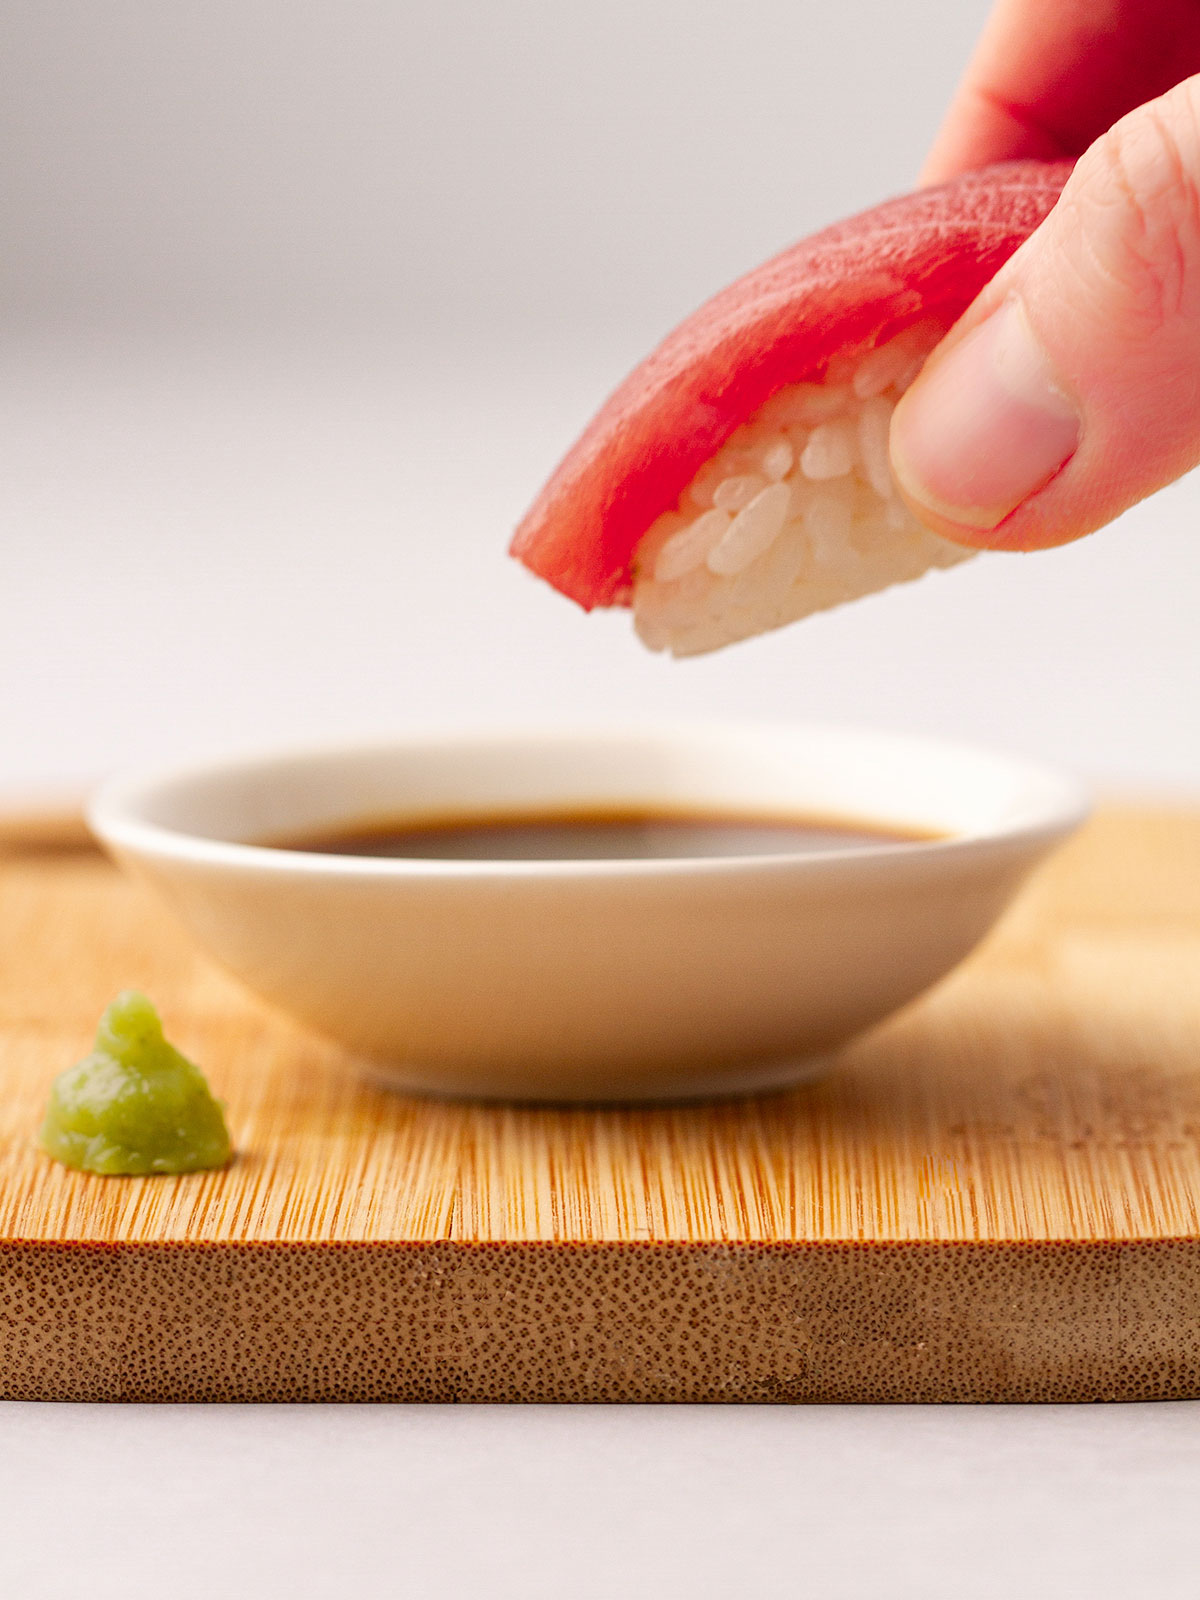
Traditionally, nigiri is eaten with your hands, gently grasped between your fingers, and dipped lightly into soy sauce. While you might spot chopsticks at many sushi bars outside Japan, using your hands is the authentic way to savor nigiri.
Besides soy sauce, there are lots of other condiments and sauces you can try. A small dab of wasabi between the fish and rice adds a kick, while a brush of ponzu sauce can offer a citrusy contrast to the fish's richness. Or there's eel sauce for those who enjoy a touch of sweetness.
People Often Ask
Salmon, tuna, and poached squid are great for beginners. They are readily available, easy to handle, and flavorful.
Nigiri might seem challenging at first, with a delicate balance required in forming the rice and in the rice-to-fish ratio. However, with practice, beginners can master it quickly. The trick lies in achieving the right rice consistency—firm enough to hold together but not so compact that it becomes dense. A bit of patience and practice go a long way.
Too much hand water is the most likely cause. While using hand water (Tezu) helps prevent the rice from sticking to your hands, overdoing it can make the rice too wet, leading to nigiri that doesn’t hold its shape.
All you really need is a sharp knife for slicing the fish, a wooden board for assembling your nigiri, and a bowl of hand water (Tezu) to keep your hands from sticking to the rice. While a specialized sushi knife can enhance the experience if you're making nigiri often, it's not a necessity.
More recipes you'll love
Did you try this recipe? It would be really great if you could leave a comment and a star rating ⭐️. I would love to receive your feedback and know that other readers find it helpful too.
Don't forget to tag #sushistayation on Instagram or @sushistaycation on Pinterest!
Printable Recipe Card
Nigiri Sushi
Equipment
- sharp knife
- medium-sized bowl
- wooden board
Ingredients
Hand water
- 1 cup water
- 2 tablespoon rice vinegar (Note 1)
Nigiri sushi
- 1 cup cooked sushi rice at body temperature (Note 2)
- 8 slices sushi grade fish (Note 3)
- ½ teaspoon wasabi (optional) (Note 4)
To serve
- soy sauce
- pickled ginger
Instructions
- Prepare the hand water by combining the water and rice vinegar in a medium size bowl.
- Pick up an egg-shaped ball of rice with your dominant hand (right hand if right-handed or left hand if left-handed), and compress it gently without crushing it into a rounded rectangular cylinder. Turn the rice in your palm a couple of times
- Pick up a piece of fish with your other hand and let it rest on your fingers.
- Optional: If you are using wasabi, smear a little on the index finger of your right hand and gently run it along the fish
- Place the rice ball onto the fish and gently press down.
- Turn the upside-down nigiri the correct way up and press your index and middle fingers onto the fish to hold it in place.
- Place the finished nigiri onto a wooden board and repeat the process with the remaining rice and fish.
Notes
- Rice vinegar: You can use apple cider vinegar instead.
- Sushi rice: You need a batch of room-temperature sushi rice, seasoned with a sushi vinegar mixture (or Sushizu). It's simple to prepare using your stove, rice cooker, or Instant Pot using my easy-to-follow sushi rice recipes.
- Sushi grade fish: Allocate a thin slice of high-quality fish per nigiri around 3 inches long, 1 inch wide, and ¼ inch thick.
- Wasabi: Available in powder or paste form. A small amount of wasabi between the fish and rice adds a kick without overwhelming the delicate flavors of the fresh fish.
Leave a Reply